Installing Helix Authentication Service
Prerequisites
- Administrative expertise with the software of your Identity Provider
- Expertise in security administration sufficient to work with both your Identity Provider (IdP) and your Perforce server product.
-
A web browser. Any client using the authentication service requires a web browser.
-
Any client (even the p4 command-line client) is still required to authenticate through your IdP's website. We recommend that at least one user with super level access use Perforce authentication instead of Helix Authentication Service. See the Authorizing Access in the Helix Core Server Administrator Guide.
-
Two valid certificates: a certificate for HAS and a certificate for the other half of the solution, which is either a Helix Core Server Extension or a Helix ALM License Server.
- One or more of the following:
Helix Core Server, version 2019.1 or later, assuming that you have knowledge of Perforce administration for authentication with tickets - see Authenticating using passwords and tickets in the Helix Core Server Administrator Guide.
Important- To configure Helix Authentication Service for Helix Core Server (P4) and the Helix Core visual client (P4V), you must configure a Helix Core Server Extension. See the Administrator's Guide for Helix Authentication Extension in the docs directory of the Helix Authentication Extension repository on GitHub.
The Helix Authentication Extension provides a mechanism to test the Helix Authentication Service with a select group of users prior to rolling out the service organization-wide. See the Testing the extension section in the Administrator's Guide for Helix Authentication Extension in the
docsdirectory of the Helix Authentication Extension repository on GitHub.
Helix ALM, version 2019.4 or later, or Surround SCM, version 2019.2 or later.
ImportantTo use the Helix Authentication Service to authenticate from Helix ALM or Surround SCM, you must configure Helix ALM License Server. see the Helix ALM License Server Admin Guide.
NoteThe diagrams at Sequence for Helix Core and Sequence for Helix ALM show the flow of information between three components:
- the IdP
- Helix Authentication Service
- Helix Core Extension (or ALM License server)
The installation and configuration of these three components can be in any order.
TipIf you want to use multi-factor authentication (MFA) with the Helix Authentication Service, consider using the multi-factor authentication solution provided by your IdP.
We do NOT recommend using the Helix MFA Authenticator with Helix Authentication Service. The Helix MFA Authenticator should only be implemented when your password store and MFA service are separated. The typical use case for the Helix MFA Authenticator is to have an on-prem password store (such as LDAP) and a cloud-based MFA service.
Four ways to install HAS
You can install Helix Authentication Service (HAS) by using any of the following:
| Docker |
The easiest option is the pre-build Docker container for download. For more information, see https://hub.docker.com/r/perforce/helix-auth-svc |
|
|
The next easiest option is the package installation. Supports
|
|
|
Supports
|
|
|
Supports
Requires an installation of:
|
Package installation
If your operating system is CentOS 7, 8 or Ubuntu 16, 18, perform the package installation that allows you to use the YUM or APT package manager.
Package installation requires sudo or root level privileges.
Verify the Public Key
To ensure you have the correct public key for installing Perforce packages, verify the fingerprint of the Perforce public key against the fingerprint shown below.
- Download the public key at https://package.perforce.com/perforce.pubkey
- To obtain the fingerprint of the public key, run:
gpg --with-fingerprint perforce.pubkey
- Verify that it matches this fingerprint:
E581 31C0 AEA7 B082 C6DC 4C93 7123 CB76 0FF1 8869
Follow the instructions that apply to you:
For APT (Ubuntu)
- Add the Perforce packaging key to your APT keyring. For example,
wget -qO - https://package.perforce.com/perforce.pubkey | sudo apt-key add -
- Add the Perforce repository to your APT configuration.
Create a file called /etc/apt/sources.list.d/perforce.list with the following line:
deb http://package.perforce.com/apt/ubuntu {distro} release
Where {distro} is replaced by one of the following: precise, trusty, xenial or bionic.
- Run apt-get update
- Install the package by running sudo apt-get install helix-auth-svc
Alternatively, you can browse the repository and download a Deb file directly from https://package.perforce.com/apt/
For YUM (Red Hat Enterprise Linux or CentOS)
- Add Perforce's packaging key to your RPM keyring:
sudo rpm --import https://package.perforce.com/perforce.pubkey
- Add Perforce's repository to your YUM configuration.
Create a file called /etc/yum.repos.d/perforce.repo with the following content:
[perforce]
name=Perforce
baseurl=http://package.perforce.com/yum/rhel/{version}/x86_64
enabled=1
gpgcheck=1where
versionis either 6 for RHEL 6 or 7 for RHEL 7 - Install the package by running sudo yum install helix-auth-svc
Alternatively, you can browse the repository and download an RPM file directly from https://package.perforce.com/yum/
Next
See the configuration steps in the Configuring Helix Authentication Service section.
Installation script
If your operating system is not supported by the package installation, we recommend using the installation script rather than performing a Manual installation. The installation script supports:
- CentOS 7, 8
- Debian 8, 9, 10
- RedHat Fedora 31, RHEL 7 and 8
- Ubuntu 14, 16, and 18
Installation steps
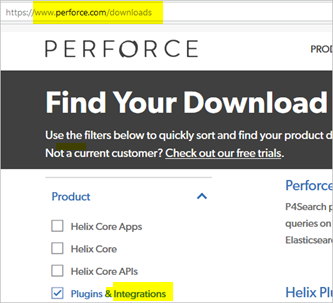
- Download Helix Authentication Service from the Perforce download page by selecting Plugins & Integrations.
- For Family, choose Platform Independent, select TGZ or ZIP, and Download.
- Expand the downloaded .tgz or .zip file.
- Verify that you now have a README file, an example.env file, and an install.sh file. The install.sh is the bash installation script.
- Verify that the bin subdirectory contains the configure-auth-service.sh file.
- Run the bash script named install.sh, which installs Node.js and then builds the service dependencies.
- Modify the service configuration by creating your own editing the .env file. Configuration consists of defining the identity provider (IdP) details for either OIDC or SAML, and setting the SVC_BASE_URI of the authentication service.
- (Recommended) For better security, replace the example self-signed SSL certificates with ones signed by a trusted certificate authority.
- Restart the service by using the systemctl restart helix-auth command. (The
systemctlcommand is part of the systemd process manager for Linux.)
When you type
./install.sh -h
the output is:
Installation script for authentication service.
Usage:
install.sh [-m] [-n]
Description:
Install the authentication service and its dependencies.
-m
Monochrome; no colored text.
-n
Non-interactive; does not prompt for confirmation.
-h | --help
Display this help message.
Next
See the configuration steps in the Configuring Helix Authentication Service section.
Manual installation
The manual installation supports more operating systems than does the package installation.
Easy way to install Node.js
If you are going to do a manual installation of HAS, a prerequisite is an installation of Node.js. Various packages for Node.js make it easy to install Node.js.
Installing Node.js on Ubuntu
| 14, 16, and 18 |
|---|
|
Packages from NodeSource are easy to install: $ sudo apt-get install build-essential curl git |
Installing Node.js on CentOS/RHEL 7
CentOS, Oracle Linux, and RedHat Enterprise Linux lack Node.js packages of the versions required by this service, but there are packages available from NodeSource that are easy to install.
$ sudo yum install curl git gcc-c++ make
$ curl -sL https://rpm.nodesource.com/setup_14.x | sudo -E bash -
$ sudo yum install nodejs
Installing Node.js on CentOS/RHEL 8
$ sudo yum install curl git gcc-c++ make
$ curl -sL https://rpm.nodesource.com/setup_14.x | sudo -E bash -
$ dnf --repo=nodesource download nodejs
$ sudo rpm -i --nodeps nodejs-14.*.rpm
$ rm -f nodejs-14.*.rpm
Installing Node.js on Fedora 31
This release of Fedora provides a compatible version of Node.js, so installation is simple.
$ sudo dnf install nodejs
CentOS/RHEL 6, 7, 8, Fedora 31, Ubuntu 14, 16, 18
- Make sure you have an installation of Node.js, version 14 or later (see Easy way to install Node.js ).
- Perform the step under Installing Module Dependencies.
Other Linux distributions
- Download and install the Linux Binaries for Node.js, version 14 or later, making sure that the bin folder is added to the PATH environment variable when installing and starting the service.
- Perform the step under Installing Module Dependencies.
Windows 10 Pro and Windows Server 2019
- Download and run both:
- the Windows-based installer for Git because it is a precondition for installing Node.js
- the Windows-based installer for Node.js LTS
- Perform the step under Installing Module Dependencies.
Note that Windows native toolchain, available by installing the Chocolatey Windows package manager, is not required for the authentication service.
Windows as a service
If you want HAS to run automatically as a service, see Installing as a Windows service .
Installing Module Dependencies
The following command copies dependencies from the Node.js package site into the node_modules directory within HAS. Open a terminal window and change to the directory containing the service code, then run:
$ npm install
- Download Helix Authentication Service from the Perforce download page by selecting Plugins & Integrations.
- Expand the .tgz or .zip file you downloaded.
- Verify that you now have a README file and an ecosystem.config.js file.
Next
See the configuration steps in the Configuring Helix Authentication Service section.


